Thursday, February 22, 2024

Latvian Flower Weaving and a Card Weaving Pattern

 These beautiful bands are one step up from plain weave bands in difficulty. It’s the first step into pickup. The patterns have a 6 row repeat with a pickup every three rows. There are a few patterns on Pinterest. I have them pinned in my Latvian Flower Pattern file which is within the Fiber Arts file.

I wrote directions for doing Latvian Weave for my students and will repeat it here.

I’m assuming you know how to read the threading pattern given at the bottom of the pattern. If you haven’t done this before, it’s quite easy. Start on the left hand side. Notice the pattern is a zig zag. It starts with 2 reds followed by 2 greens… when making your pattern, follow the same pattern. Put your colors down in a zig zag which stand for heddled and unheddled threads. If you will use a rigid heddle, look and see whether it starts with a slot or hole on the ends. Heddled are your holes and unheddled are the slots.

I always recommend recreating the pattern with your colors. Keep things as easy as possible. It only takes a few minutes and can save you a great deal of time and frustration.

Latvian flower patterns- 

starts with a plain weave pattern

then every 3 rows there is a pickup


A pickup can be a thread pulled up, or

a thread pushed down


Look at the pattern and Choose 4 colors


Using graph paper, make your own threading pattern using your colors. Just substitute your colors for the original ones.


Lay out and Color in the pattern


Notice the outside threads are also the weft color. Make sure the weft color is the color in the center of the flower.


Look at the Pattern

Row 2 keeps the 2 center green up

Row 5 has a push down of the 2 center threads

Warp the 23 threads, set up weave

Reference to detailed notes (next pages)

starting on the correct shed, follow the pattern


Following the warping pattern above, remember to read the pattern on a  zig-zag - red, red, green, green, yellow, yellow


Warp and set up your weaving


Weave about an inch plain


Look at your heddle - are the holes or slots on the outside?

directions are set up for holes on the outside.

this means - heddle UP is 2 threads wider than heddle down.


Look at your pattern.

Notice the odd rows are wider than the even rows

Therefore you will be heddle up on odd rows

and heddle down on even rows.

The pattern must begin on the correct row!


* The pattern begins on an UP row (row 1)

However, there is no pickup on this row

Weave it normally, but before changing sheds to Heddle down

Insert a skewer, knitting needle (we’ll call this the keeper)… under the two threads that                             will remain up in row 2 (the center green ones)

Pull the keeper down to the edge of your weaving


Now change sheds


Push your keeper up the warp to the edge of the heddle. This lifts those two threads up to the level of the UP threads


Place your beater through the shed and turn it vertical to hold the shed open


Pass the shuttle


Weave the next two row’s normally (no pickup)


Row 5 has a little red bar across the center two threads. 

That is the weft.

Before passing the shuttle, use your pickup stick/beater to pull those two Threads down so the shuttle passes over them

To do this, pass the stick through the shed and up and over the two threads indicated, then back to the center of the shed and out the other side


Turn the stick vertical to hold the shed open

Pass the shuttle

The weft will appear above the two center threads


Weave the next two rows normally - no pickup


Repeat from * above for the remainder of the warp.


Pickup is the term used when threads are manipulated up and down during the weave. It can be very complex or very simple.

In my experience, the Latvian Flower Weaves all follow the same pattern with a pickup row every three rows. Here on rows 2 and 5.


This was woven with #10 crochet cotton, a 3 ply fiber larger than 8/2 and smaller than 8/4 cotton. I’m finding I really enjoy working with smaller fiber! With small fiber, I’m not sure I want to do pickup with it, so….I got out the pattern maker and designed this little 14 card pattern for Card Weaving. This will be very pretty, and there’s no pickup!


Wednesday, February 21, 2024

Easy Card Weaving

I consider a 4 forward- 4 backward weave to be a very easy weave. Setup of course is set up, but the weave goes very quickly. To make it even easier, I tie a string around hole D on the left hand card when it’s in AD position. That way I always know when I’m home and ready to change direction. The other thing I do is count 1, 2, 3, 4, 5, 6, 7, 8. If I’m on 1-4 I’m going forward. If I’m on 5-8 I’m going backward.

Between the two practices, I keep my mind on the weaving and not out wandering.


Pinterest has many easy patterns and I have them pinned under Card Weaving Easy in my Fiber Arts folder (Deborah Peters). In addition, I have started using a pattern making app: SeiZenn from raktres.com. It allows you to design band patterns and is great! 

My current project is from an original pattern I’m calling Blue Lotus. It’s only 16 cards and oh so pretty. I’m weaving it in #20 cotton and it’s  7/16” wide. I have a few ideas about where I’ll use it. Requires some sewing…


Here are several other new patterns. Try them if you like. It’s interesting to see what they look like using different sizes of yarn. Delicate in fine yarn to bold with 8/4 cotton.


Thistle
24 cards
4 forward, 4 backward


Roses
24 Cards
4 forward 4 /ackward


Dancing Gulls, 24 cards, 4 forward 4 backward


Giraffes, 45 cards, 4 forward 4 backward


Western Diamonds, 24 cards, 8 forward, 8 backward

Hope you have fun with these! 


Monday, February 19, 2024

Double Faced Card Weaving

It’s been awhile! Both for this blog and for Card Weaving which started my weaving adventure so many years ago. Now that I’m teaching Back Strap Weaving I’m doing more personal weaving. Over the past month, new fibers have gone into my pieces. 

My daughter requested a double faced weave out of silk. The silk she sent was knitting silk and not fine at all and for me the colors were quite drab. She likes subtle, so who am I to judge? She wanted vines, so I remembered a beautiful pattern created by J L MacLaren that I found on Pinterest.


For a double faced weave, every row is repeated twice, so I regraphed the pattern into something easy to work with. The cards are threaded with two light threads in AB and two dark threads in CD, or visa versa. Keeping track of the repeats is easy. I start with the shuttle thread on the right side, and I divide the cards into two groups as I turn the cards the first time. The cards going forward move away from me into one group and the cards moving backwards turn back toward me into the second group. Use your hands inside the shed to be sure all threads have settled where they are supposed to be. I do this by inserting my index and middle finger into the space between the two groups and spread the shed wide. Then double check the working shed in the front to be sure all the ups are up and downs are down. Beat, then pass the shuttle.
Once the first row is done, the cards are all ready for row two. Turn the group away from you forward and the group directly in front of you backwards; again insert fingers between the two groups to widen the shed, check the working shed and get your hand or a beater in there to beat. Then pass the shuttle. When both rows are done, gently bring both groups back together. I use a 6” ruler on my pattern and after bringing all cards back into one group, the ruler gets moved up one row and weaving continues. If you’re not sure you have done both rows, check where your shuttle thread is. If it’s on the left, you combined the groups too soon! The shuttle has to be back on the right where you started. You would think this would be easy, but sometimes concentration takes a little nap or side trip and when you come back…..it can be a nightmare!

One of the most important things is to keep the cards in a group, and of course have even tension on the cards. Especially when turning your back on them! I’ve used rubber bands or yarn to tie them together in the past. Now I’m using knit stitch holders. They are wonderful! I call them keepers and when they are in place I have no worries when setting the weaving aside, or when pulling in the woven band so I can reach the fell (edge of the weaving).

I learned from Laverne Waddington that using a very heavy iron on damp silk brings out its beauty. If you don’t know about Laverne, check out her FB page: Backstrap Weaving, her blog and her wonderful Books! Her work is extraordinary!

Card Weaving Setup is different from other types of weaving, and I think I’ve finally come up with a good method!
I use bar clamps to hold my warp as I measure out the fibers. I also use  a wonderful little stick with holes to keep my yarn from tangling while warping. I’ve added two boards with skewers to keep the weaving orderly. The last two items - those skewer boards - really did the trick. I thread two holes at a time. So, pattern in hand, a place keeper for the pattern, baskets/boxes/bowls on the floor to place each cone into and then feed them up through the divider holes in the little warping board (totally different from the usual warping board) it goes something like this:
  
Put the Bar Clamps the distance apart you want your warp to be - bar end up.   

Place one card in front of you. 

Look at the pattern. What colors do you need for holes A and B? 
    If they are the same, take that color and drag it behind the first clamp, down and around the second clamp and back to the first one. I hold both ends beyond the clamp about 1.5” and snip the long end. Then take the two ends and thread them into A and B on the card. 
    Let’s say the next two colors are different. Pick them up and place an overhand knot close to the ends. Pull them both down and over clamp 2. Return back to clamp 1 and hold both yarns beyond the clamp by 1.5” and clip them both off. 

Thread them. Be sure of the direction. Are they S threaded, coming up from the back, or Z threaded, going down through the holes from the front? Be sure all four threads are threaded the same way! 

Now tie a slip knot with the open ends to keep them orderly. 

Next place hole D over the skewer that’s waiting in one of the boards. It should be @1’ from clamp 1 and between both clamps. 

Now go to clamp two. Take the threads off and at their apex (where the turn takes place) tie an overhand knot to secure the four threads together. A tail should be barely there! 

Now divide the threads in half and slide them over the second skewer post. The yarn should lay straight between the skewer posts.

Continue in this manner until all cards have been threaded.
    If it’s a short stack, tie a scrap yarn through the opening where the skewer is. Tie it tight! And make a good loop where you can suspend it from your stationary mounting point. 
    If it’s a big stack, slide a dowel in there and tie scrap between the ends of the dowel so the warp ends are secure. Then put it between two clamps as the secure end. If you’re not going to weave it right away, go with option one, then finger crochet the whole thing down to the cards and include the final loop in one of the stitch holders that are keeping the cards in order.

Tie up to the front rod (the one that the back strap holds) with weavers knots. Start from the center with @8 yarns. Bring them all over the top of the front bar. Then divide them in half. The half on the right continues around the bar and to the outside of the group. The half on the left continues around the bar and comes up on the outside of the group on the left. Now do  single overhand tie and finish with a slip knot. Chances are you will have to retie these threads to achieve even tension, so never tie a permanent knot in them!

Beginning Weaving by placing a thin strip of cardboard, a popsicle stick or even a skewer (if the weave is going to be very narrow) in the first shed. We’ll call these spreaders. Turn the cards. Place another spreader in the next shed. Continue until 3-4 spreaders have been placed. I usually use three to four spreaders to help get the width established and get the threads orderly so everything doesn’t bunch up.

Once done, throw the shuttle through the next shed, turn the cards. 
Clear the shed; beat; bring the tail back through the shed and pass the shuttle. 
Turn the cards, beat and continue weaving for a couple more rows to establish the band. 
Ready to begin pattern. 

Start with AD on top. check to see if dark or light comes up when turning forward. This will tell you which way to turn cards to begin following the pattern.


Tuesday, August 11, 2020

#3 Back strap weaving with a rigid heddle


This blog covers rigid heddle set-up

Weaving with a rigid heddle

Advantages and disadvantages of using a rigid heddle

Winding a multi-colored warp

Shortening the warp while weaving


Materials:

3 dowels 12-14” long x 3/8 diameter: back beam, tension rod and shortening rod

Small rigid heddle (purchase on Etsy or try your hand at making one)

Fiber

Scissors

Tape measure

C clamps or other method of warping - see previous blogs

Shuttle : cardboard, wood, small dowel...

Set-up and weaving

Instead of using string heddles on a heddle stick, you will need to purchase a rigid heddle.

I got mine out on Etsy. I have a small one for bands and one with 121 holes that is @12” long for scarves and other bigger things.


One advantage to using a rigid heddle is ease of weaving. You don’t have to work with two rods to change your sheds; simply push up for one shed, and pull down for the other.

Disadvantages include; having to thread all warp threads as opposed to half with string heddles. Another possible disadvantage is the increased amount of waste when doing warp dominant weaves - bands. This is due to the angle of the threads coming out of the rigid heddle as the weave becomes wider. The closer the weaving comes to the end, the harder it is to keep an even width due to the wider expanse of warp threads at the rigid heddle. Yet another disadvantage is that there will always be ends to tie onto the tension rod in order to thread it. Most of the time fringe is not an issue.

When I began weaving warp dominant bands, the rigid heddle instructions were all I could find. So that’s where I began. Working with a rigid heddle on pickup patterns is truly a joy. An inkle loom may also be used, but a rigid heddle on a backstrap loom is much easier and freeing, in my opinion.

Try it all and make your own observations. It’s good to be familiar with different methods. It will help when you are planning a piece of weaving.

When using a rigid heddle, the normal warping system works well (Create a cross- see either of the first two videos.) but, since we’re not using very many threads, there is a quicker way.


Forget the cross.

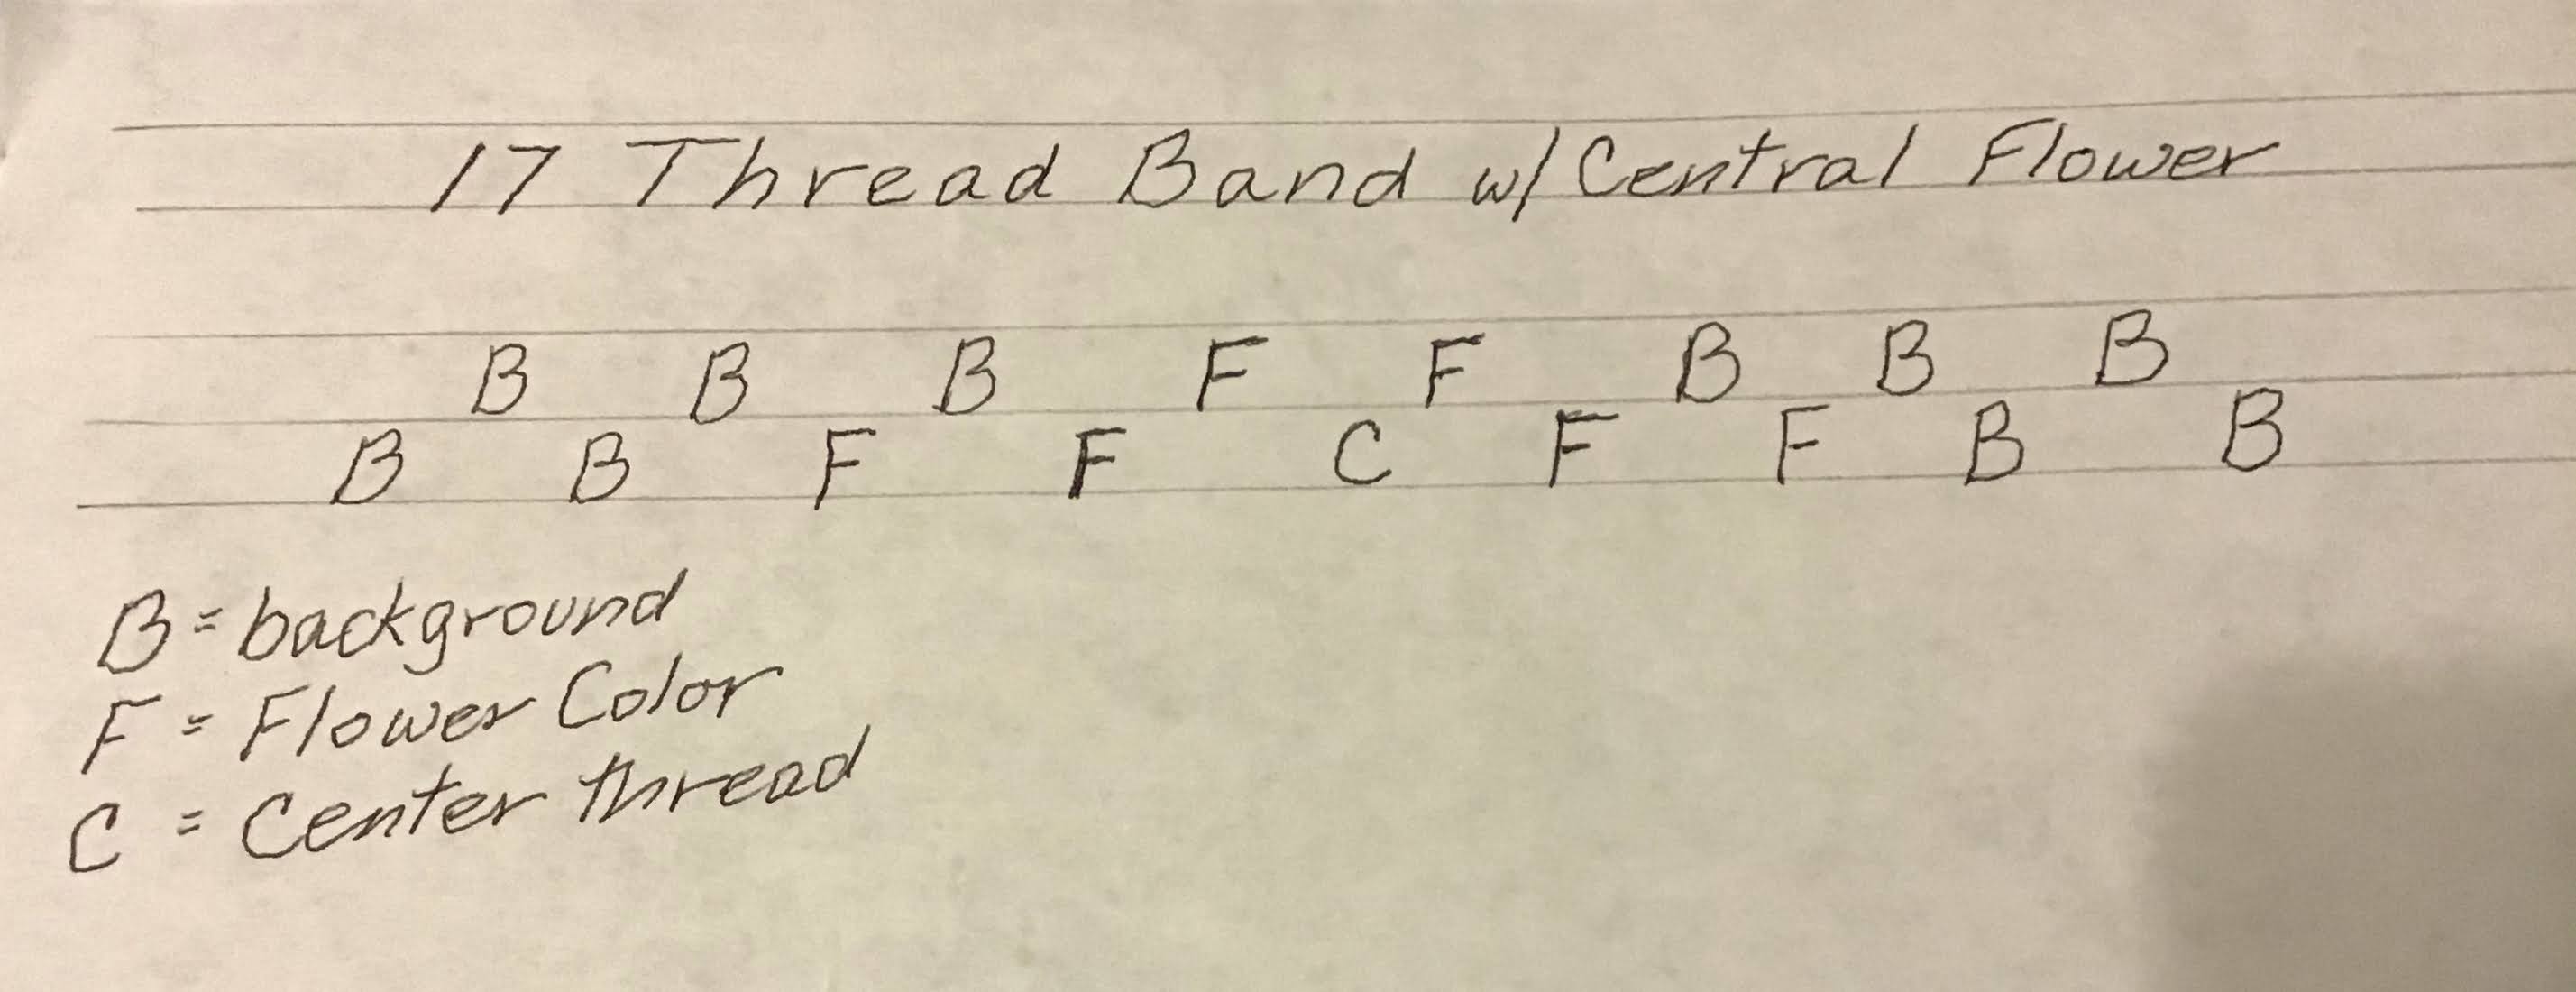
warp all the background, then all the flower, then the single center. 

10 background, 6 flower, 1 center. 

This gives you the number of threads for the pattern.


Take the warp (all the threads you wound) off the pegs.

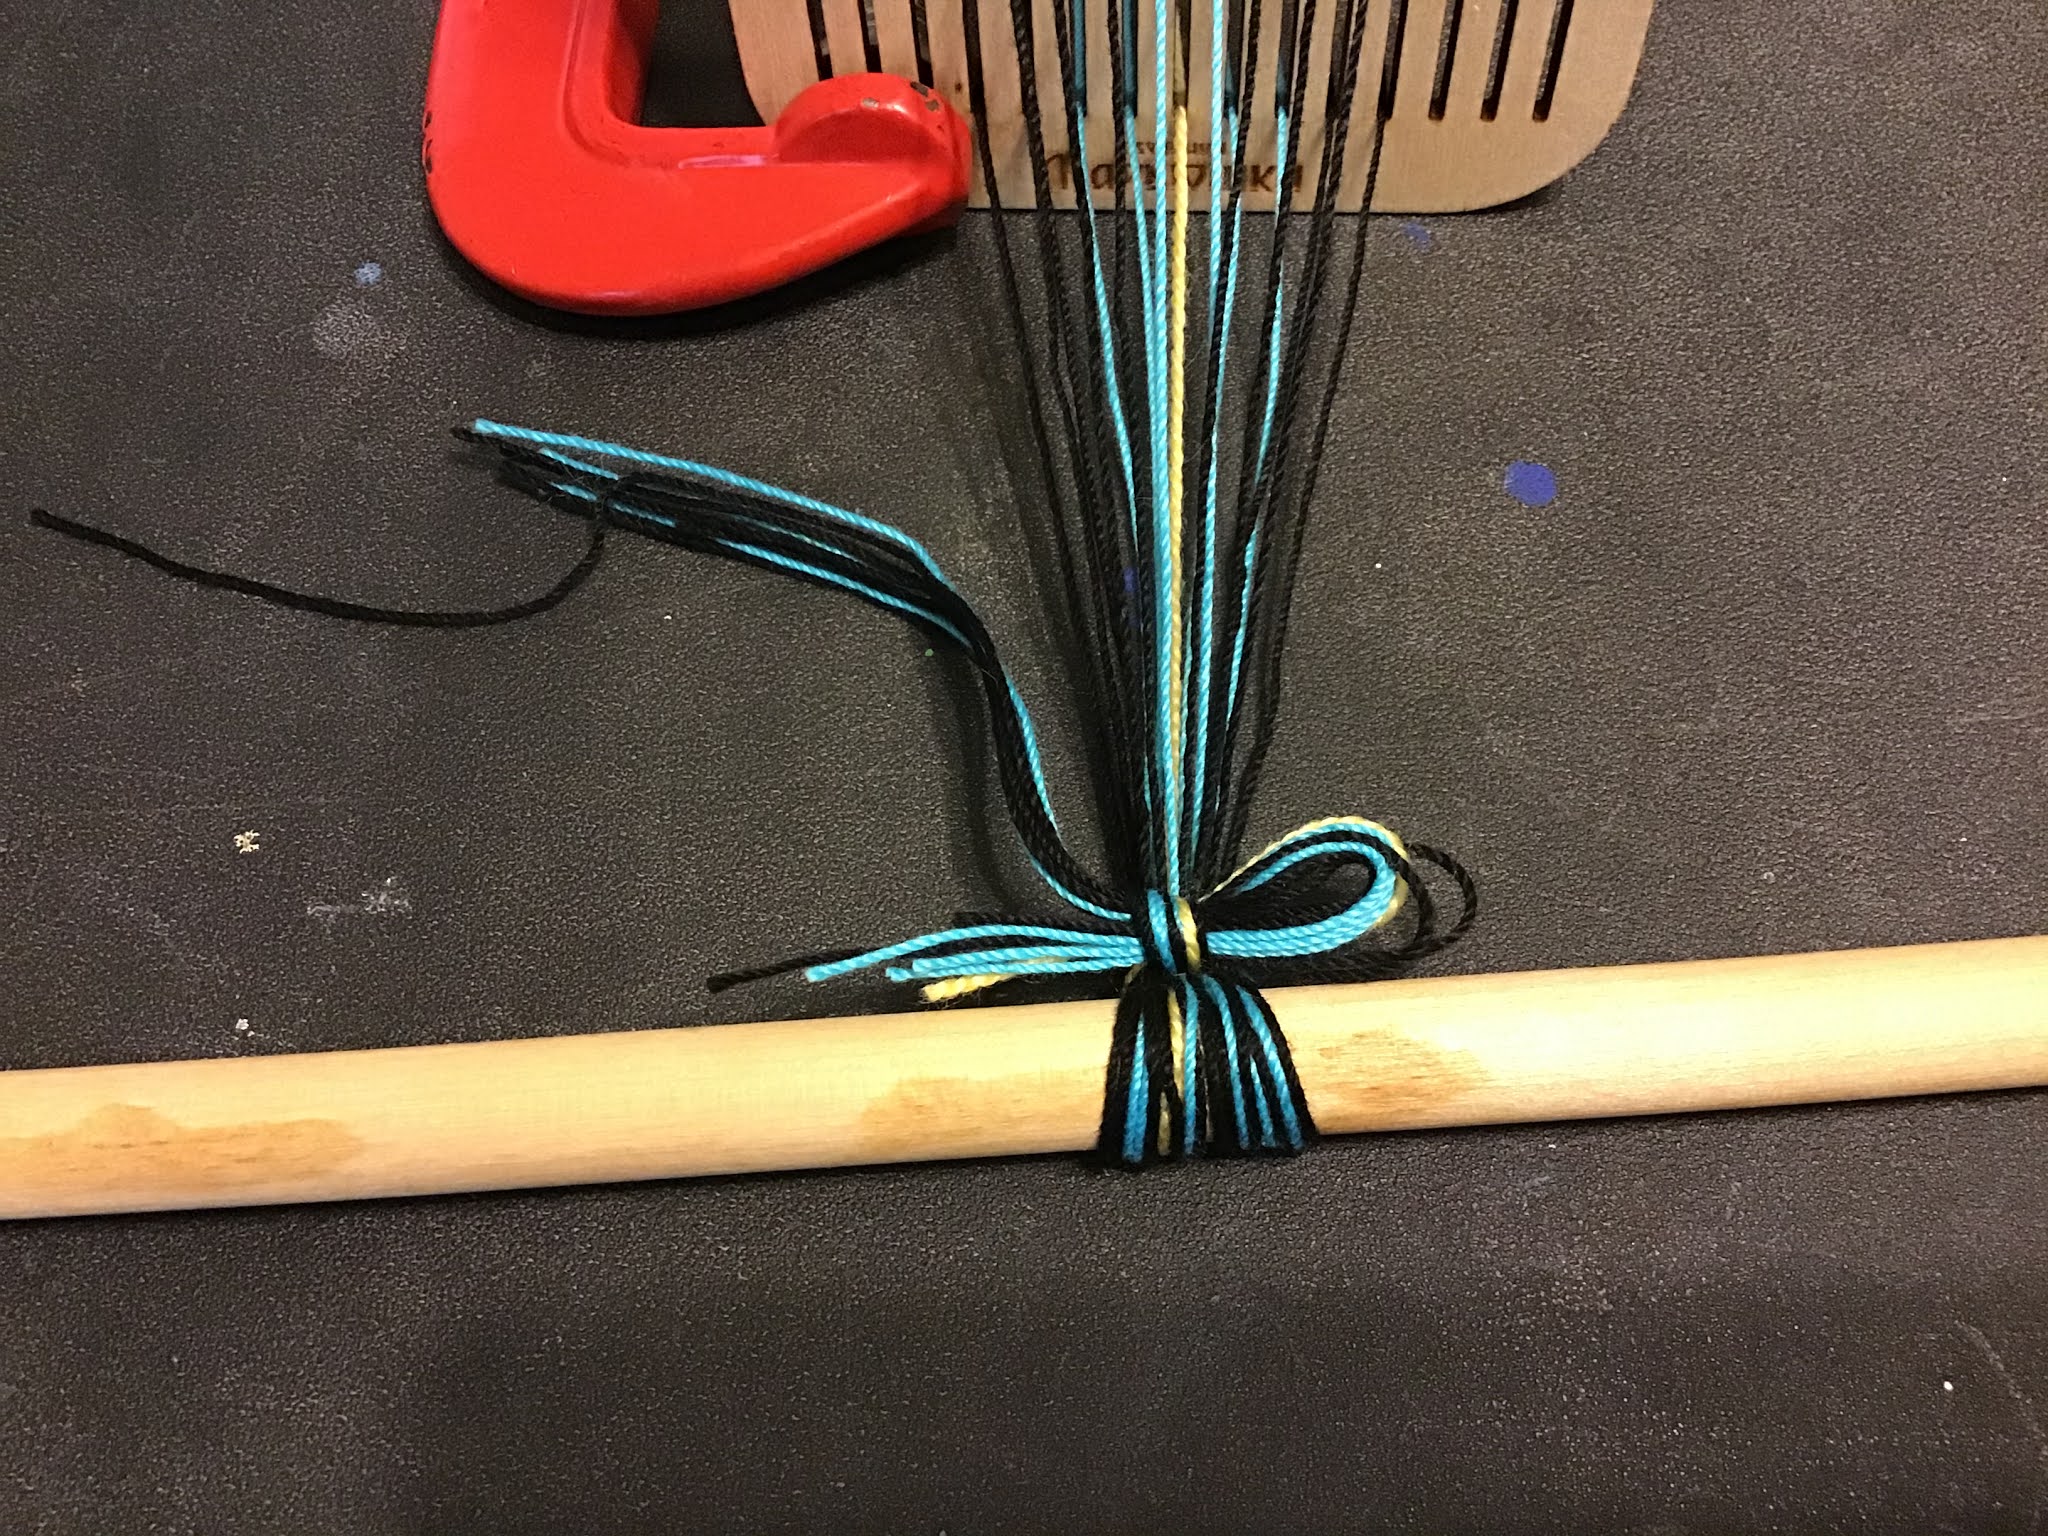
Tie one end in an overhand knot, 

Put a dowel through and lash to a stationary object. Try to keep it perfectly horizontal. 😉


   A ladder back chair is ideal! A bed frame also works well, porch railing...

   You may just put this end back around one c clamp without the dowel. 

   Or tie on a strong string and tie it around a doorknob.


thread the heddle in the above pattern.

start from the center and work out both ways. 

(Your heddle is balanced this way.)

(I use a clamp to hold my rigid heddle up for easy threading.) 


Here a cross is being used and is being held by chop sticks (lease sticks) 
If using the quick method for minimal warp threads, start from the center and just be careful to thread according to the pattern.

See the center yellow thread on the bottom of the center slot. Begin with that. 

If using the cross, lay the lease sticks out so you can see the order of threads and follow it.

There is no question which thread is next when using this method.


Once it is threaded, (Double and triple check. Are the sides mirror images? Does the threading truely match the pattern? Walk away and check it again when coming back. There’s nothing more frustrating than finding you have a mistake in your threading.)

Pull all threads to create even tension. 

Tie an overhand knot.

Put a 12 x 14” dowel through the center of the warp. 


Make two loops each 8-10”  long from strong small cord. A shoe string works great!

Slip them onto your belt on either side of the buckle


Put the end of the dowel through each of these loops, 

circling the dowel a few times on each side so it won’t come off. 

If your dowel does not have a “neck” on it, use rubber bands to secure it to the loops.


When you begin weaving wider pieces, Or even with this narrow one,

the ends will be tied to the tension rod with a special knot.

When working with a wider warp, divide the threads evenly and make multiple knots.

Check that the tension is even all the way across. (Lean back and bounce your hand gently over the warp. Does it feel the same all the way across or is a section mushy?)


You are ready to weave. 


Sit in a chair with the weaving stretched out in front of you 

with your warp tied onto the tension rod and the rod connected to your belt


Move forward or backward to achieve a nice tension.


To weave with a rigid heddle: 

Lean forward

pull the heddle up

Pass the shuttle 

Lean back

Pull the weft through


Lean forward

Pull the heddle down

Pass the shuttle, pass the end of the weaving back through this shed to secure it.

Lean back

Pull the weft the rest of the way through. 


Lean forward

Pull the heddle up

Pass the shuttle

Catch the fiber that has not yet gone through the shed (which is forming a loop) with your pinky or ring finger

Pull the loop and shuttle thread toward you until weaving Width is achieved

   Use both hands for this. It sounds confusing, but it’s easy. Just move both hands back toward you 

Pinch with the hand on the loop side with thumb and index finger

Pull the weft thread through


Pull the heddle down

Pass the shuttle

Catch the loop with your pinky or ring finger

Pull the loop and shuttle thread toward you until weaving is desired width

Pinch with The hand on the loop side

Pull shuttle thread through


Pinching as you pull through allows you to feel how tight or loose your weft thread is. 


This is how you control the width.


We are doing a warp dominant weave here. The weft should only show at the edges where it turns around.


Continue weaving, alternating between up heddle and down heddle, until you can’t reach the fell line (the edge of your weaving.)

To shorten the warp

Get the last dowel (the same length as the others)
 Unwrap the tension rod dowel from your belt loops. Keep the tension up!
Place the new dowel under the tension rod dowel
Roll the weaving Under and away from you
When you’re an inch or so from the fell line,:
Whichever dowel is on top, reconnect to your belt loops
Move your chair forward, adjust the tension
Continue weaving.

Continue weaving as far as you can. 
The rigid heddle will not allow you to weave as far as the string heddles because of the width of the warp at the heddle.

Secure the end of your weaving
Cut the weaving off at the lashed rod
Tie an overhand knot.
Trim fringe.


What to do if you need to put it away mid-weave.

Once the weaving is on the dowels, just wind it all the way up from the tension rod 

(the one connected to your belt) 

to the back beam/rod. 

Tie it and it’s safe until you get back to it.


Check out the YouTube video for more visual learning.

I hope you keep exploring this wonderful art.