This blog covers rigid heddle set-up
Weaving with a rigid heddle
Advantages and disadvantages of using a rigid heddle
Winding a multi-colored warp
Shortening the warp while weaving
Materials:
3 dowels 12-14” long x 3/8 diameter: back beam, tension rod and shortening rod
Small rigid heddle (purchase on Etsy or try your hand at making one)
Fiber
Scissors
Tape measure
C clamps or other method of warping - see previous blogs
Shuttle : cardboard, wood, small dowel...
Set-up and weaving
Instead of using string heddles on a heddle stick, you will need to purchase a rigid heddle.
I got mine out on Etsy. I have a small one for bands and one with 121 holes that is @12” long for scarves and other bigger things.
One advantage to using a rigid heddle is ease of weaving. You don’t have to work with two rods to change your sheds; simply push up for one shed, and pull down for the other.
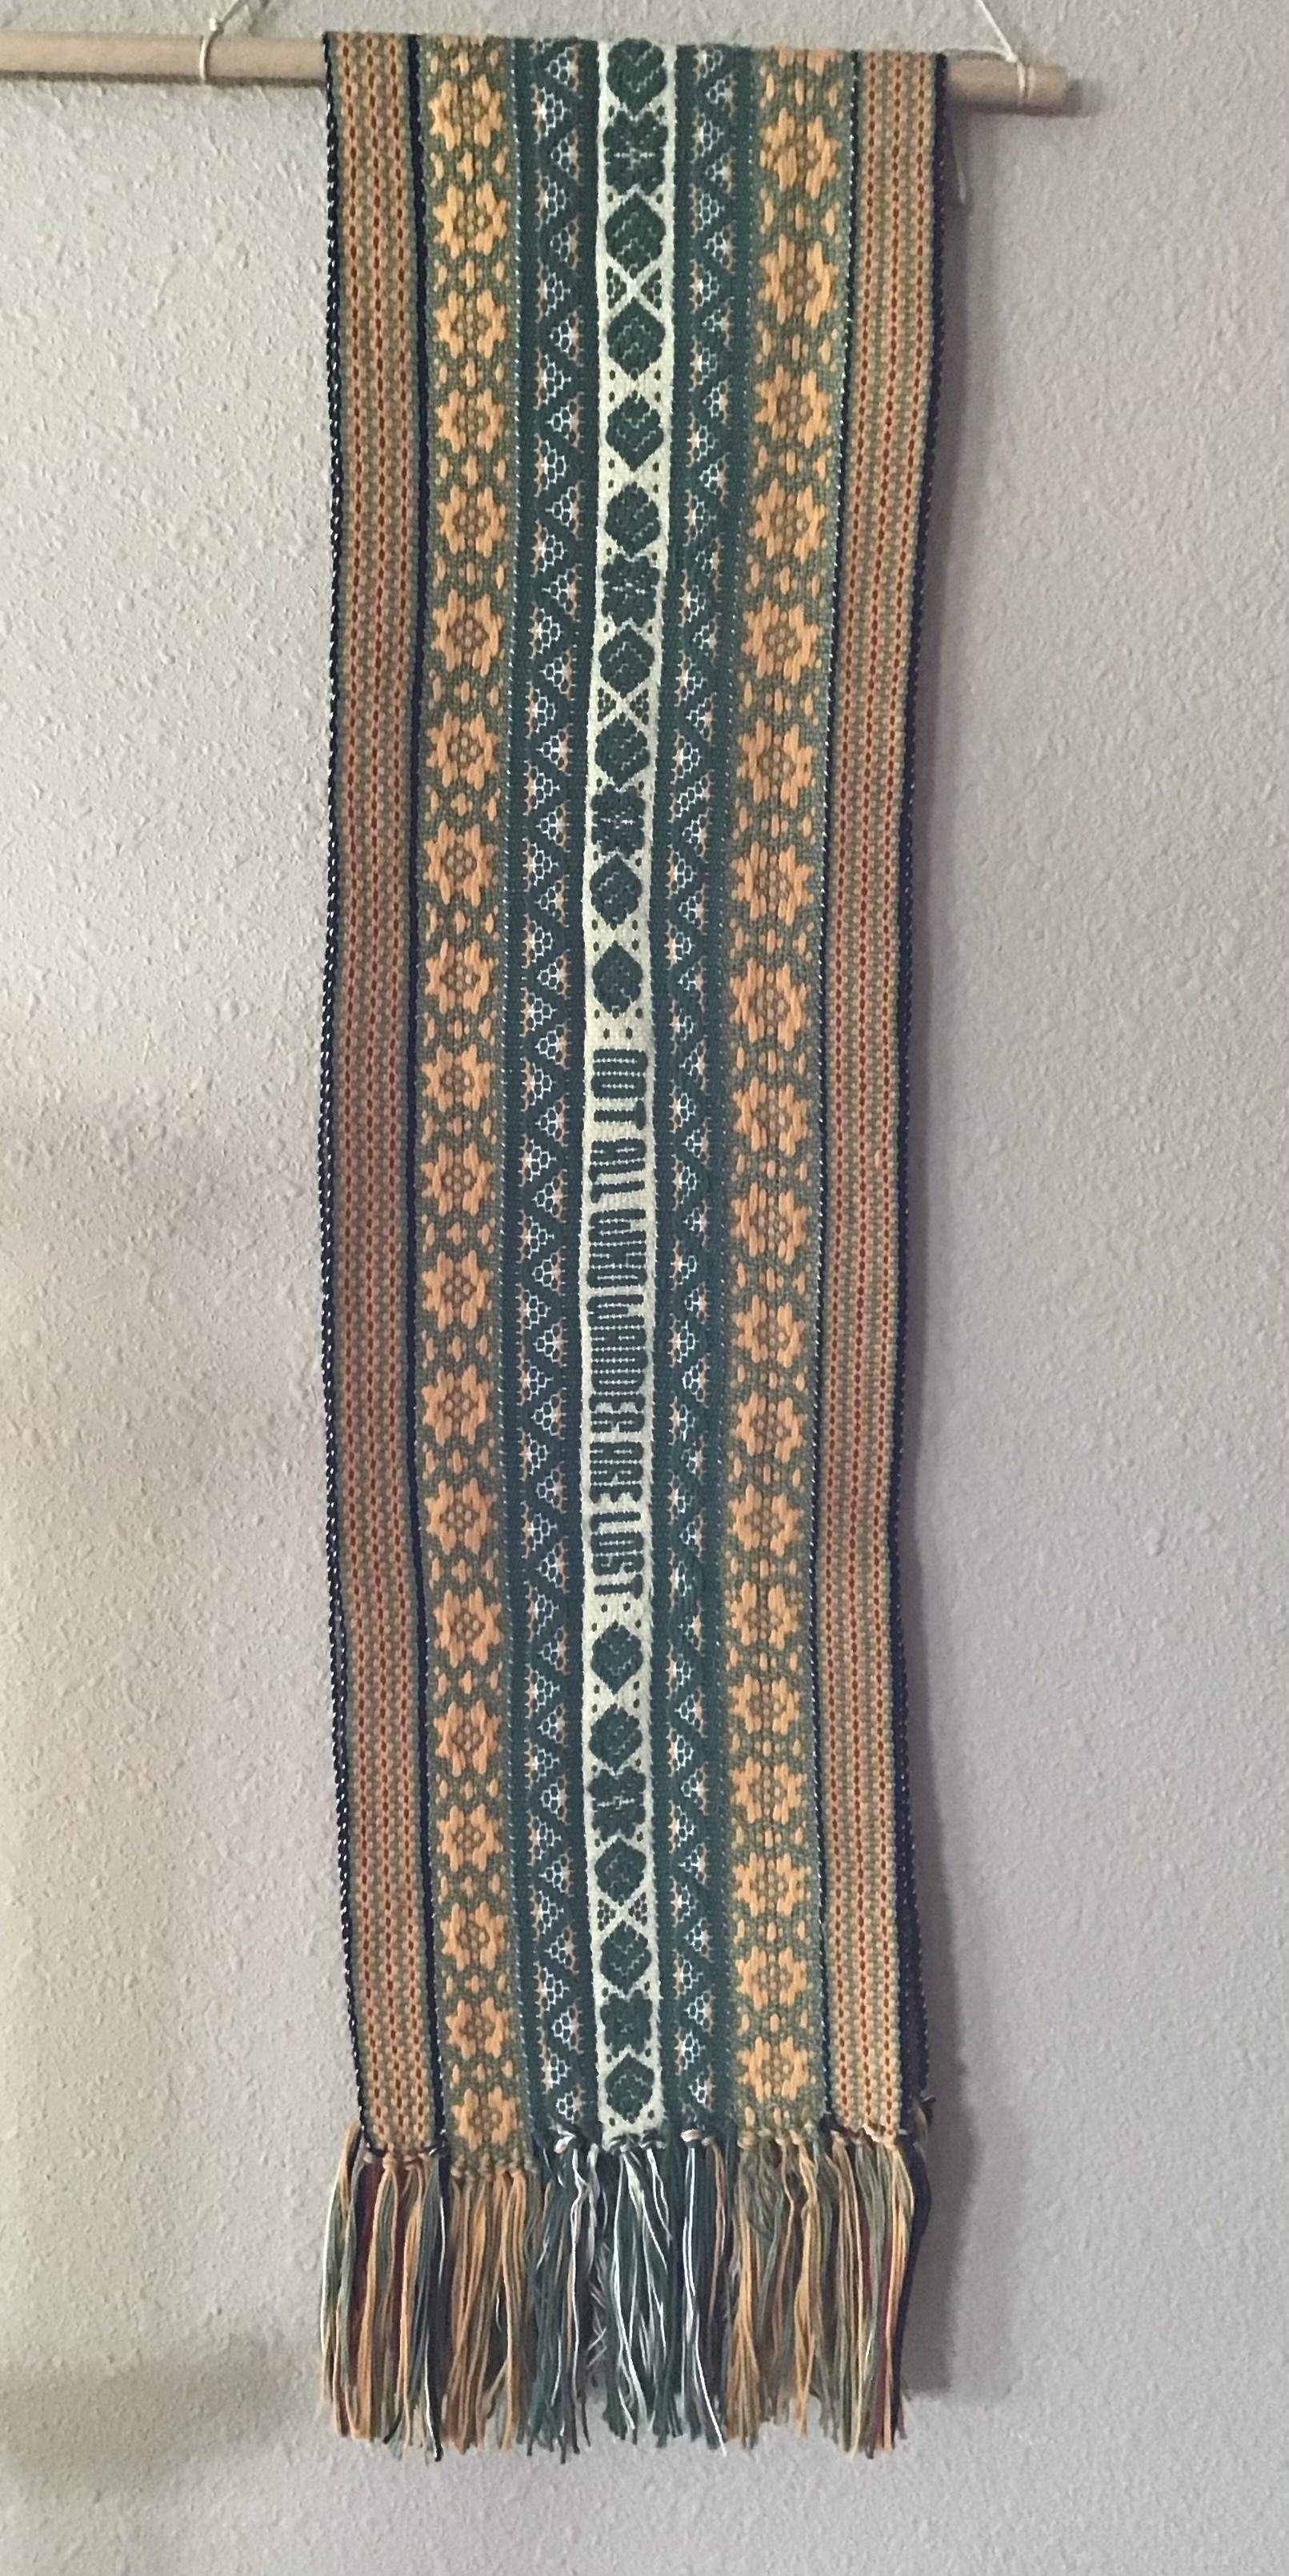
Disadvantages include; having to thread all warp threads as opposed to half with string heddles. Another possible disadvantage is the increased amount of waste when doing warp dominant weaves - bands. This is due to the angle of the threads coming out of the rigid heddle as the weave becomes wider. The closer the weaving comes to the end, the harder it is to keep an even width due to the wider expanse of warp threads at the rigid heddle. Yet another disadvantage is that there will always be ends to tie onto the tension rod in order to thread it. Most of the time fringe is not an issue.
When I began weaving warp dominant bands, the rigid heddle instructions were all I could find. So that’s where I began. Working with a rigid heddle on pickup patterns is truly a joy. An inkle loom may also be used, but a rigid heddle on a backstrap loom is much easier and freeing, in my opinion.
Try it all and make your own observations. It’s good to be familiar with different methods. It will help when you are planning a piece of weaving.
When using a rigid heddle, the normal warping system works well (Create a cross- see either of the first two videos.) but, since we’re not using very many threads, there is a quicker way.
Forget the cross.
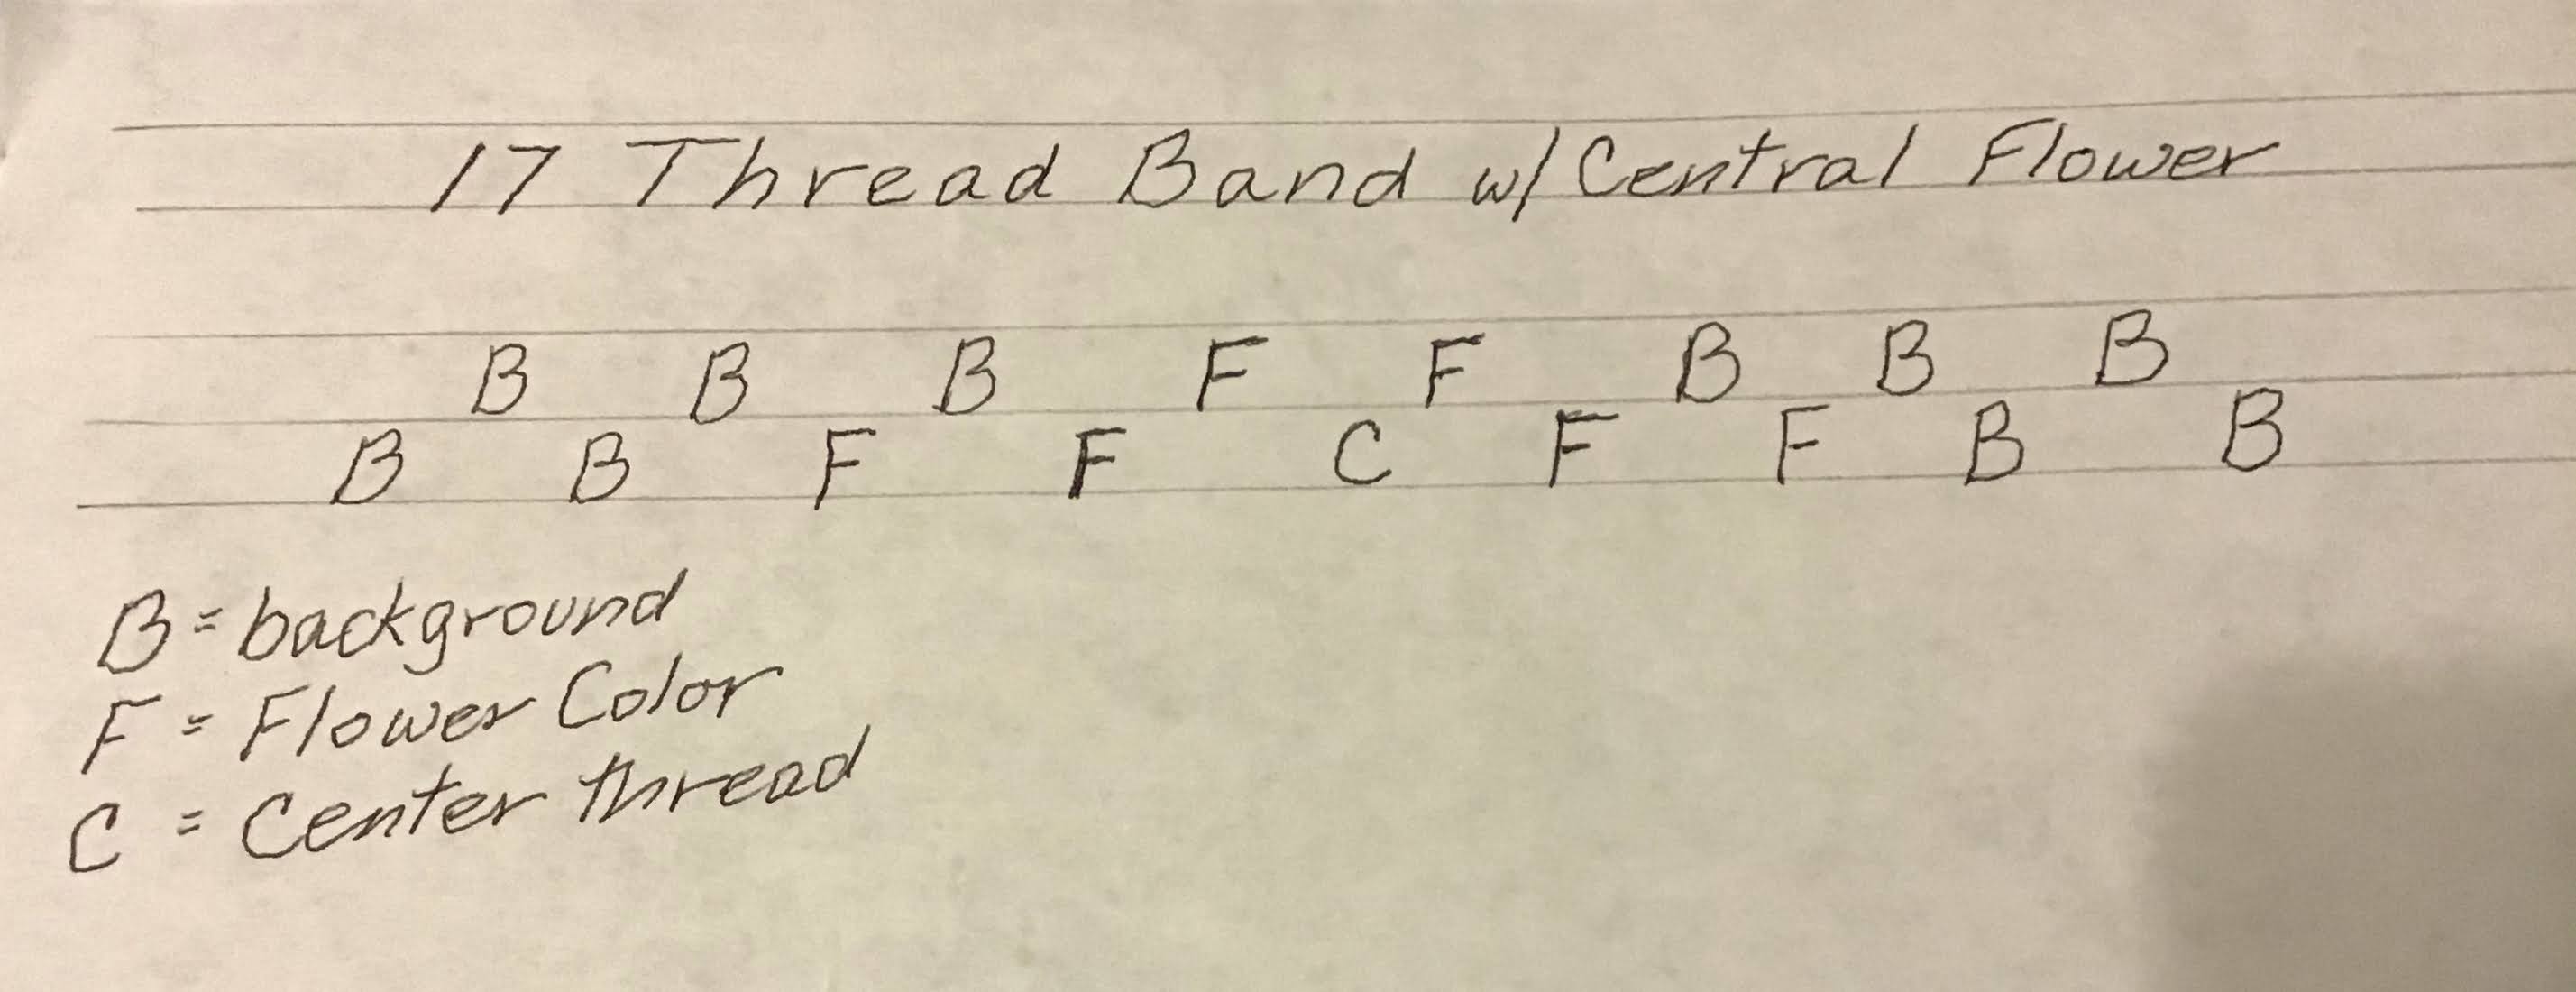
warp all the background, then all the flower, then the single center.
10 background, 6 flower, 1 center.
This gives you the number of threads for the pattern.
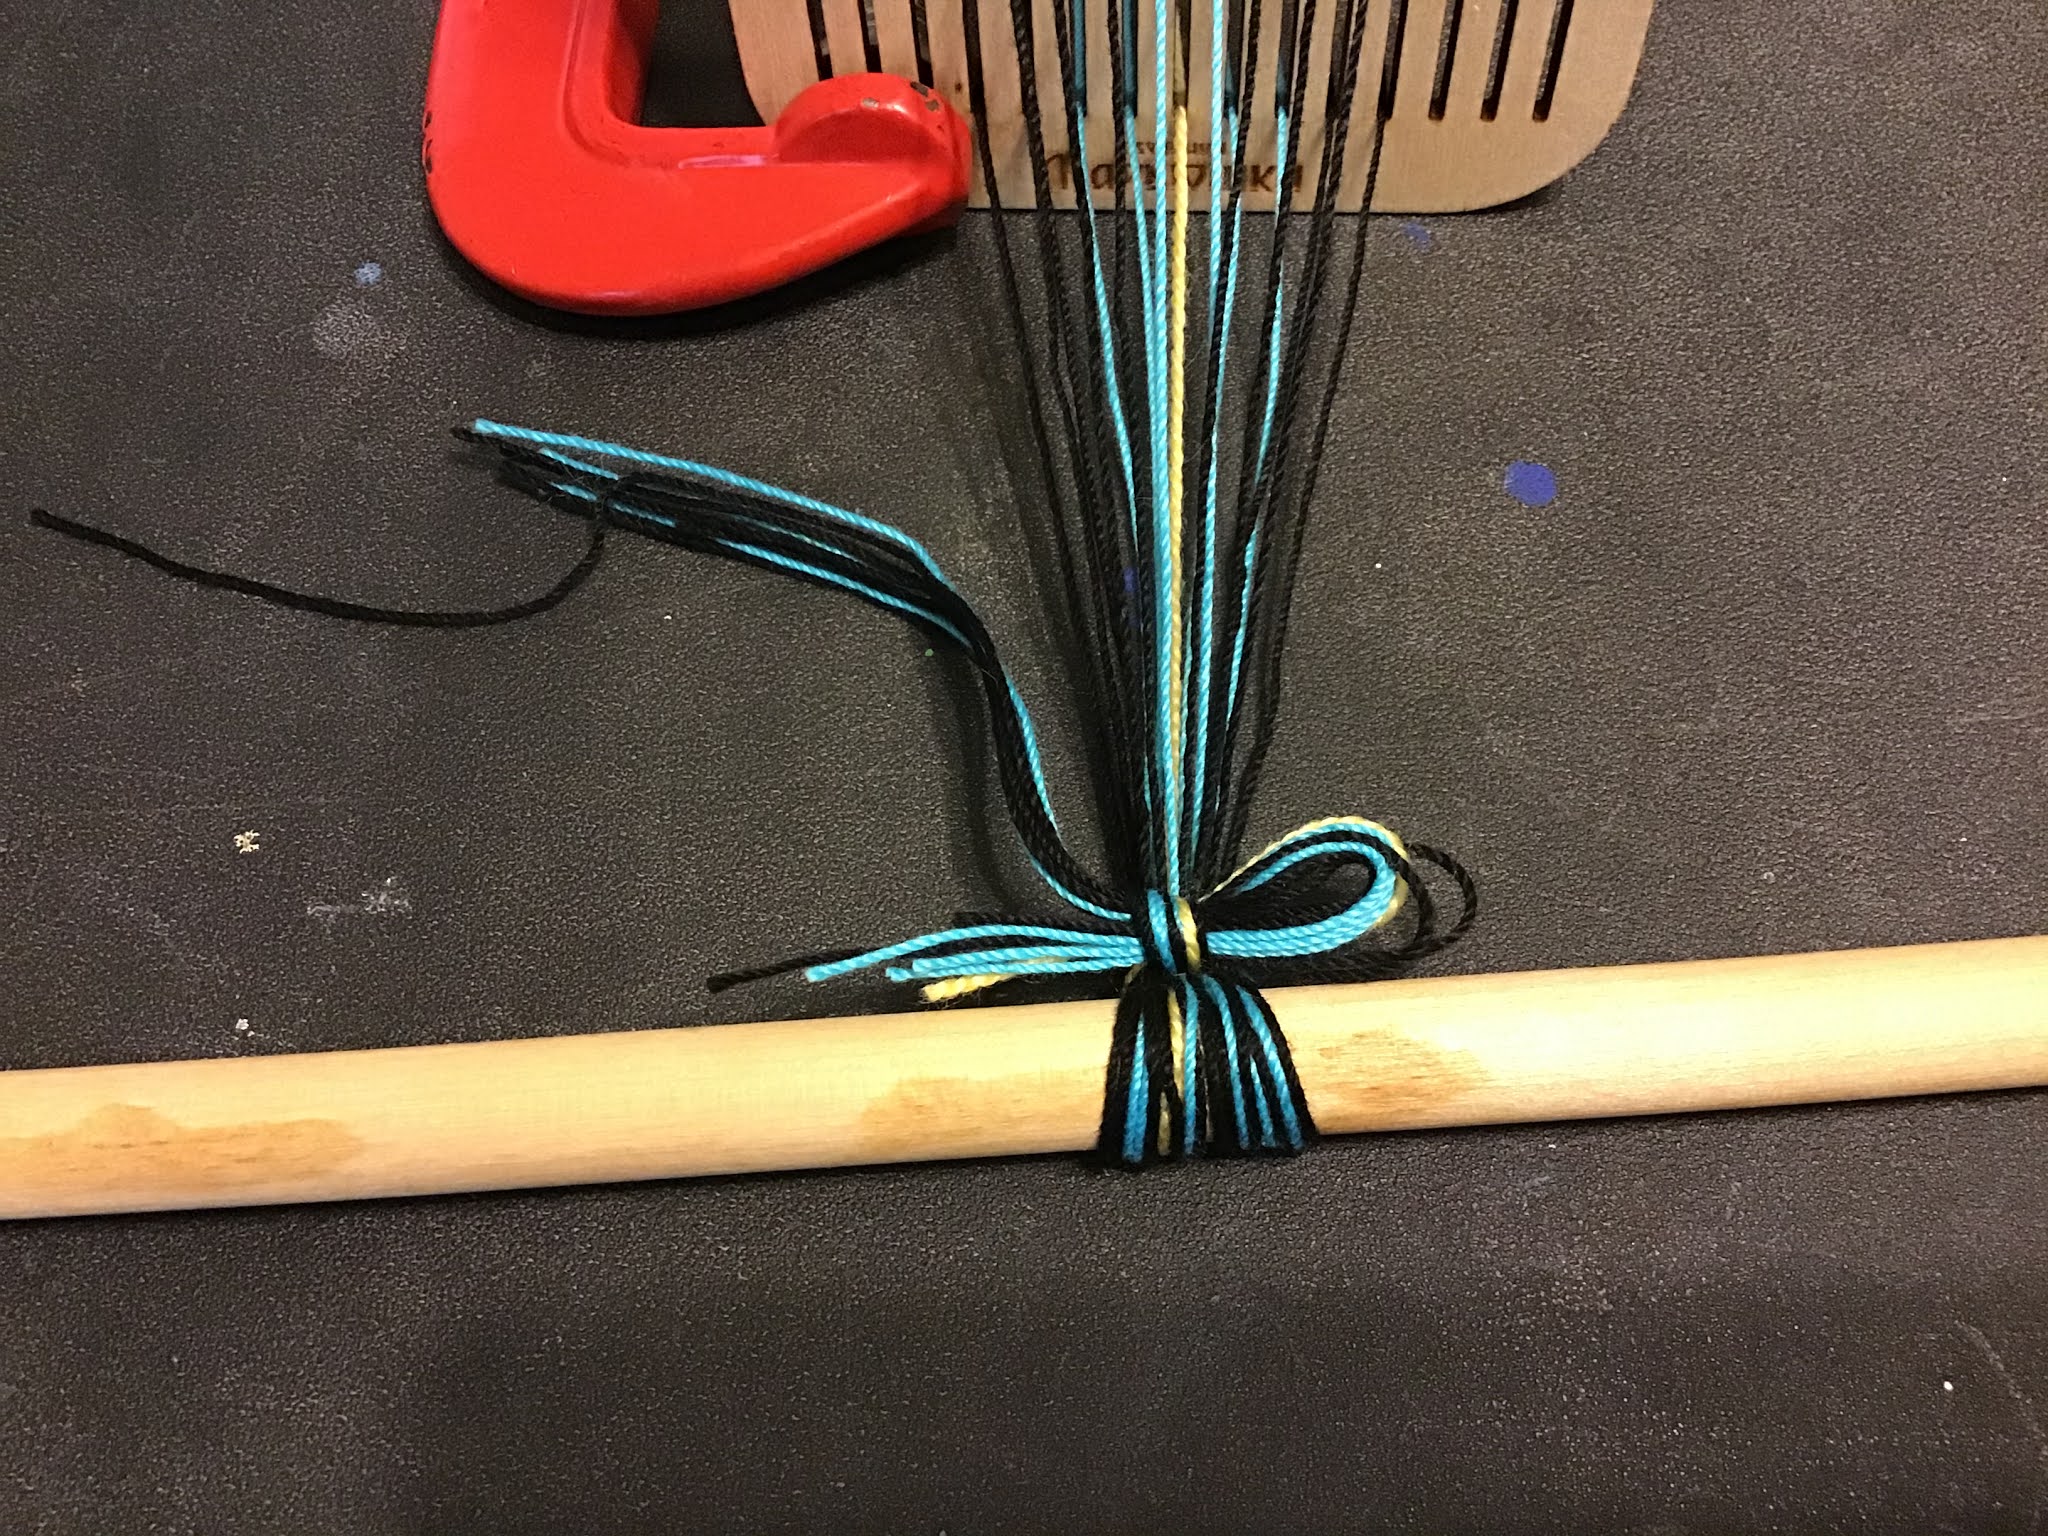
Take the warp (all the threads you wound) off the pegs.
Tie one end in an overhand knot,
Put a dowel through and lash to a stationary object. Try to keep it perfectly horizontal. 😉
A ladder back chair is ideal! A bed frame also works well, porch railing...
You may just put this end back around one c clamp without the dowel.
Or tie on a strong string and tie it around a doorknob.
thread the heddle in the above pattern.
start from the center and work out both ways.
(Your heddle is balanced this way.)
(I use a clamp to hold my rigid heddle up for easy threading.)
Here a cross is being used and is being held by chop sticks (lease sticks) If using the quick method for minimal warp threads, start from the center and just be careful to thread according to the pattern.
See the center yellow thread on the bottom of the center slot. Begin with that.
If using the cross, lay the lease sticks out so you can see the order of threads and follow it.
There is no question which thread is next when using this method.
Once it is threaded, (Double and triple check. Are the sides mirror images? Does the threading truely match the pattern? Walk away and check it again when coming back. There’s nothing more frustrating than finding you have a mistake in your threading.)
Pull all threads to create even tension.
Tie an overhand knot.
Put a 12 x 14” dowel through the center of the warp.
Make two loops each 8-10” long from strong small cord. A shoe string works great!
Slip them onto your belt on either side of the buckle
Put the end of the dowel through each of these loops,
circling the dowel a few times on each side so it won’t come off.
If your dowel does not have a “neck” on it, use rubber bands to secure it to the loops.
When you begin weaving wider pieces, Or even with this narrow one,
the ends will be tied to the tension rod with a special knot.
When working with a wider warp, divide the threads evenly and make multiple knots.
Check that the tension is even all the way across. (Lean back and bounce your hand gently over the warp. Does it feel the same all the way across or is a section mushy?)
You are ready to weave.
Sit in a chair with the weaving stretched out in front of you
with your warp tied onto the tension rod and the rod connected to your belt
Move forward or backward to achieve a nice tension.
To weave with a rigid heddle:
Lean forward
pull the heddle up
Pass the shuttle
Lean back
Pull the weft through
Lean forward
Pull the heddle down
Pass the shuttle, pass the end of the weaving back through this shed to secure it.
Lean back
Pull the weft the rest of the way through.
Lean forward
Pull the heddle up
Pass the shuttle
Catch the fiber that has not yet gone through the shed (which is forming a loop) with your pinky or ring finger
Pull the loop and shuttle thread toward you until weaving Width is achieved
Use both hands for this. It sounds confusing, but it’s easy. Just move both hands back toward you
Pinch with the hand on the loop side with thumb and index finger
Pull the weft thread through
Pull the heddle down
Pass the shuttle
Catch the loop with your pinky or ring finger
Pull the loop and shuttle thread toward you until weaving is desired width
Pinch with The hand on the loop side
Pull shuttle thread through
Pinching as you pull through allows you to feel how tight or loose your weft thread is.
This is how you control the width.
We are doing a warp dominant weave here. The weft should only show at the edges where it turns around.
Continue weaving, alternating between up heddle and down heddle, until you can’t reach the fell line (the edge of your weaving.)
To shorten the warp
Get the last dowel (the same length as the others)
Unwrap the tension rod dowel from your belt loops. Keep the tension up!
Place the new dowel under the tension rod dowel
Roll the weaving Under and away from you
When you’re an inch or so from the fell line,:
Whichever dowel is on top, reconnect to your belt loops
Move your chair forward, adjust the tension
Continue weaving.
Continue weaving as far as you can.
The rigid heddle will not allow you to weave as far as the string heddles because of the width of the warp at the heddle.
Secure the end of your weaving
Cut the weaving off at the lashed rod
Tie an overhand knot.
Trim fringe.
What to do if you need to put it away mid-weave.
Once the weaving is on the dowels, just wind it all the way up from the tension rod
(the one connected to your belt)
to the back beam/rod.
Tie it and it’s safe until you get back to it.
Check out the YouTube video for more visual learning.
I hope you keep exploring this wonderful art.