


When I first started weaving, bands were it! I still love weaving beautiful bands. I began with a little rigid heddle that I purchased from Mariya Popova of Handweaving tools on Etsy. Wonderful lady to work with. As she is in Russia and I was in Texas it took 3 weeks for my heddles to arrive. I got the small one, 31 holes and the Big one 121 holes I believe and enjoy using them. I also got two shuttles from her again, small and large. Your shuttle should be about the same width or slightly longer than your weaving. Unless you’re making a tiny band, then let it be comfortable in your hand.
The rigid heddle is a wonderful tool and very easy to work with. I still wanted to learn traditional backstrap weaving, but information on how to was slim. There are some good videos out there now and I’m grateful for them. I’m hoping my offering will have something that was eluding you.
Our society seems to be consumed by competition. Don’t let this flow into your weaving. Don’t compare your work with others. You are just learning; they may have been doing this for years. Instead, compare your second piece to your first. What has improved? What have you learned? Applaud yourself for what you have achieved and learn from mistakes. Mistakes are simply stepping stones to help you learn and improve. If you need to compare, always do it within your own work.
In weaving tension is your friend. Never leave your threads slack for they like to tangle up with their neighbors! This small piece is not excluded. Be very careful to keep it stretched out. I suggest using a heavy or large fiber to begin with. It’s easier to see what you are doing. A smooth fiber is best. Don’t use something that likes to felt (stick together) if you find it sticking together and making it difficult to open your sheds, try spraying it with water before you give up. Crochet cotton makes a beautiful project. I like working with #10, but for learning begin with something much heavier. That’s why I’m suggesting a worsted weight.
This band is a warp faced weave. That means the warp (long threads that are tied to your backstrap) are pulled together so the weft (thread on your shuttle) doesn’t show except at the edges. There is much to learn with this first piece! Keep it small and short. Consecutive videos will add to your abilities.
Pay very close attention to the technique I use when pulling the shuttle thread through the warp. Even edges are your goal. It takes time, practice and patience to achieve them.
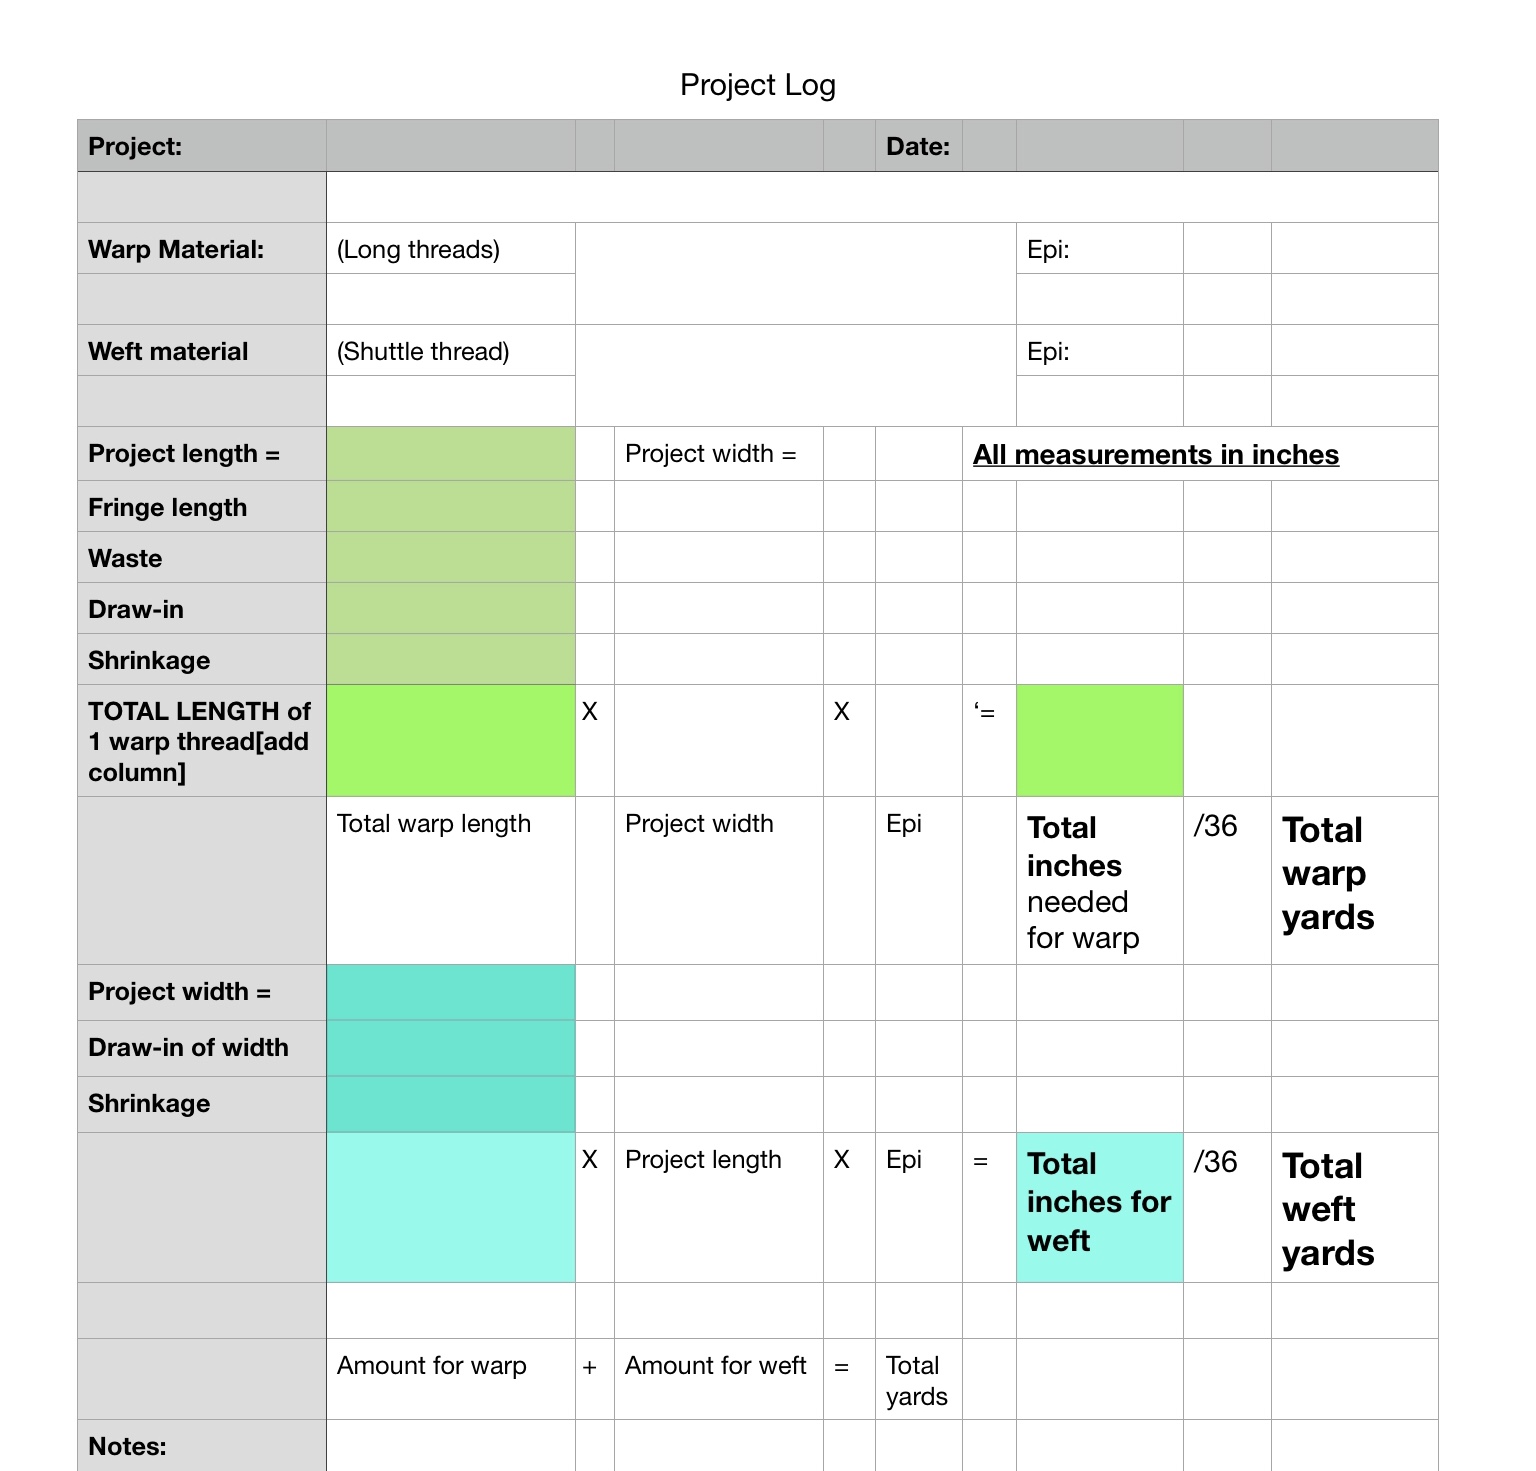
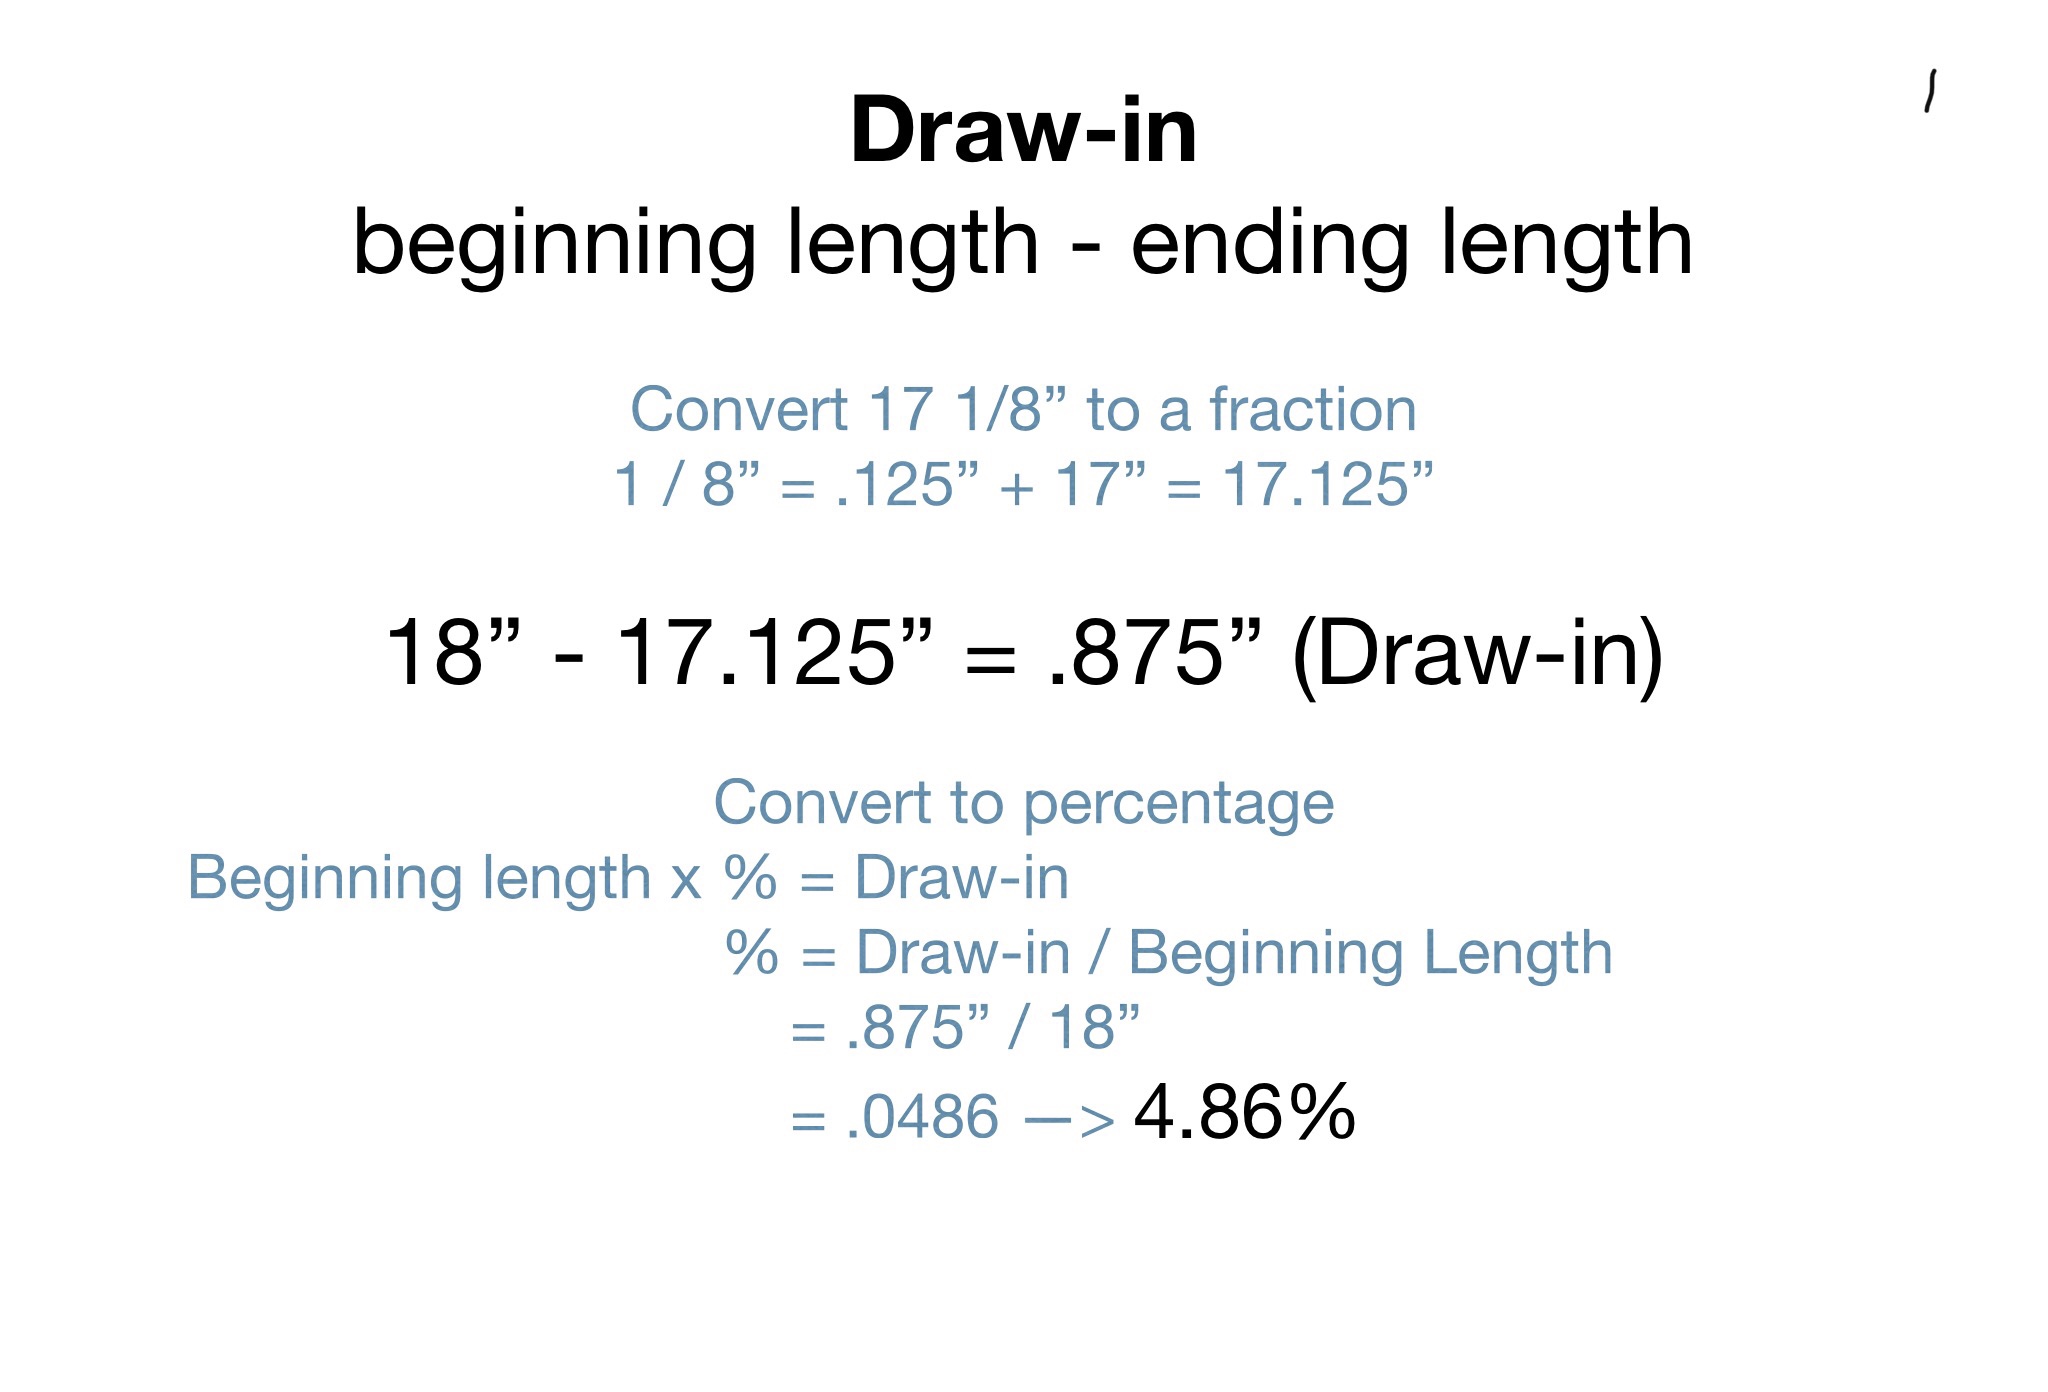
Weaving is a wonderful activity for homeschoolers as well. It can be tied in with studying history, social studies, English, math, and of course, art. There are many calculations that go into planning a piece of weaving. For example: this piece has 10 threads, 18” long. That’s 10x18=180” the weft (shuttle thread) is 7/16’s wide - (we’ll say 1/2” to simplify it), 7” long and there are 6 rows to the inch. 1/2 x 7 x 6 = 21” if you are using the same fiber for warp and weft you get 180 + 21 = 201” / 36” to a yard (the common measurement for fiber) equals 5.58 or approximately 6 yards to make this project. There are more calculations to take into consideration for future projects including draw-in, fringes, shrinkage and all are important. I’ll include a blank project sheet at the end on the video along with some notes. It’s very important to keep good records on each project in a notebook. They will be invaluable as you continue weaving! Have fun! 😊
More information is on my YouTube video: Beginning Backstrap Weaving
Happy Creating!