I’ve been busy weaving and designing patterns, so I’ll share them with you here. Over the past month I’ve done @12 weaves, trying out my patterns and putting them into a craft fair as “Boot Bling” (Picture below). The sale was a small success and my work received many compliments which were much appreciated.
One pattern that I have wanted to do for years was a Double Faced weave of Maple leaves. NOT for beginners! It was tedious but very satisfying! It is now a little wall hanging. I also made two pouches. One for my phone out of one long band and a second out of 4 of the boot blings sewn onto a piece of fabric. Both turned out beautifully!
The maple leaf graph is on Pinterest.
This is an updated pattern that added veining to the leaves of the pattern used in the second pouch.
My mind came up with a new “I Wonder…” can cards and rigid heddle be combined so the bands are included in the piece without having to sew them on? A bit of research on You tube gave me an affirmative answer, so a bit of warping over two days and some help (Thank you Annette!) with the final wind on to my 24” loom got me set to start.
This loom has been hanging unused in the shed for over a year. It also needed a stand which I built several weeks ago with the feeling I was going to need it. The only modification to my simple frame loom was the addition of a little castle to hold the up heddle dowel. Here it is after @24 rows.
It works! It’s slow, but very satisfying. The cards must be behind the heddle and a good process is needed. I’m starting on the left and turning the left border cards, then the right and finally the heddle. Then open the sheds on the two borders (one at a time) feeding the beater into the sheds of the right hand border, continuing into the heddle border, then opening the left border (again) with my fingers and feeding the beater through. Give a good beat, then stand it up and pass the shuttle, leaving it at a 30* angle so the edges don’t pull in. Change the sheds, and repeat. The other thing I’m doing is checking my width every row and making sure the weft is nice and clean on the shuttle edge.
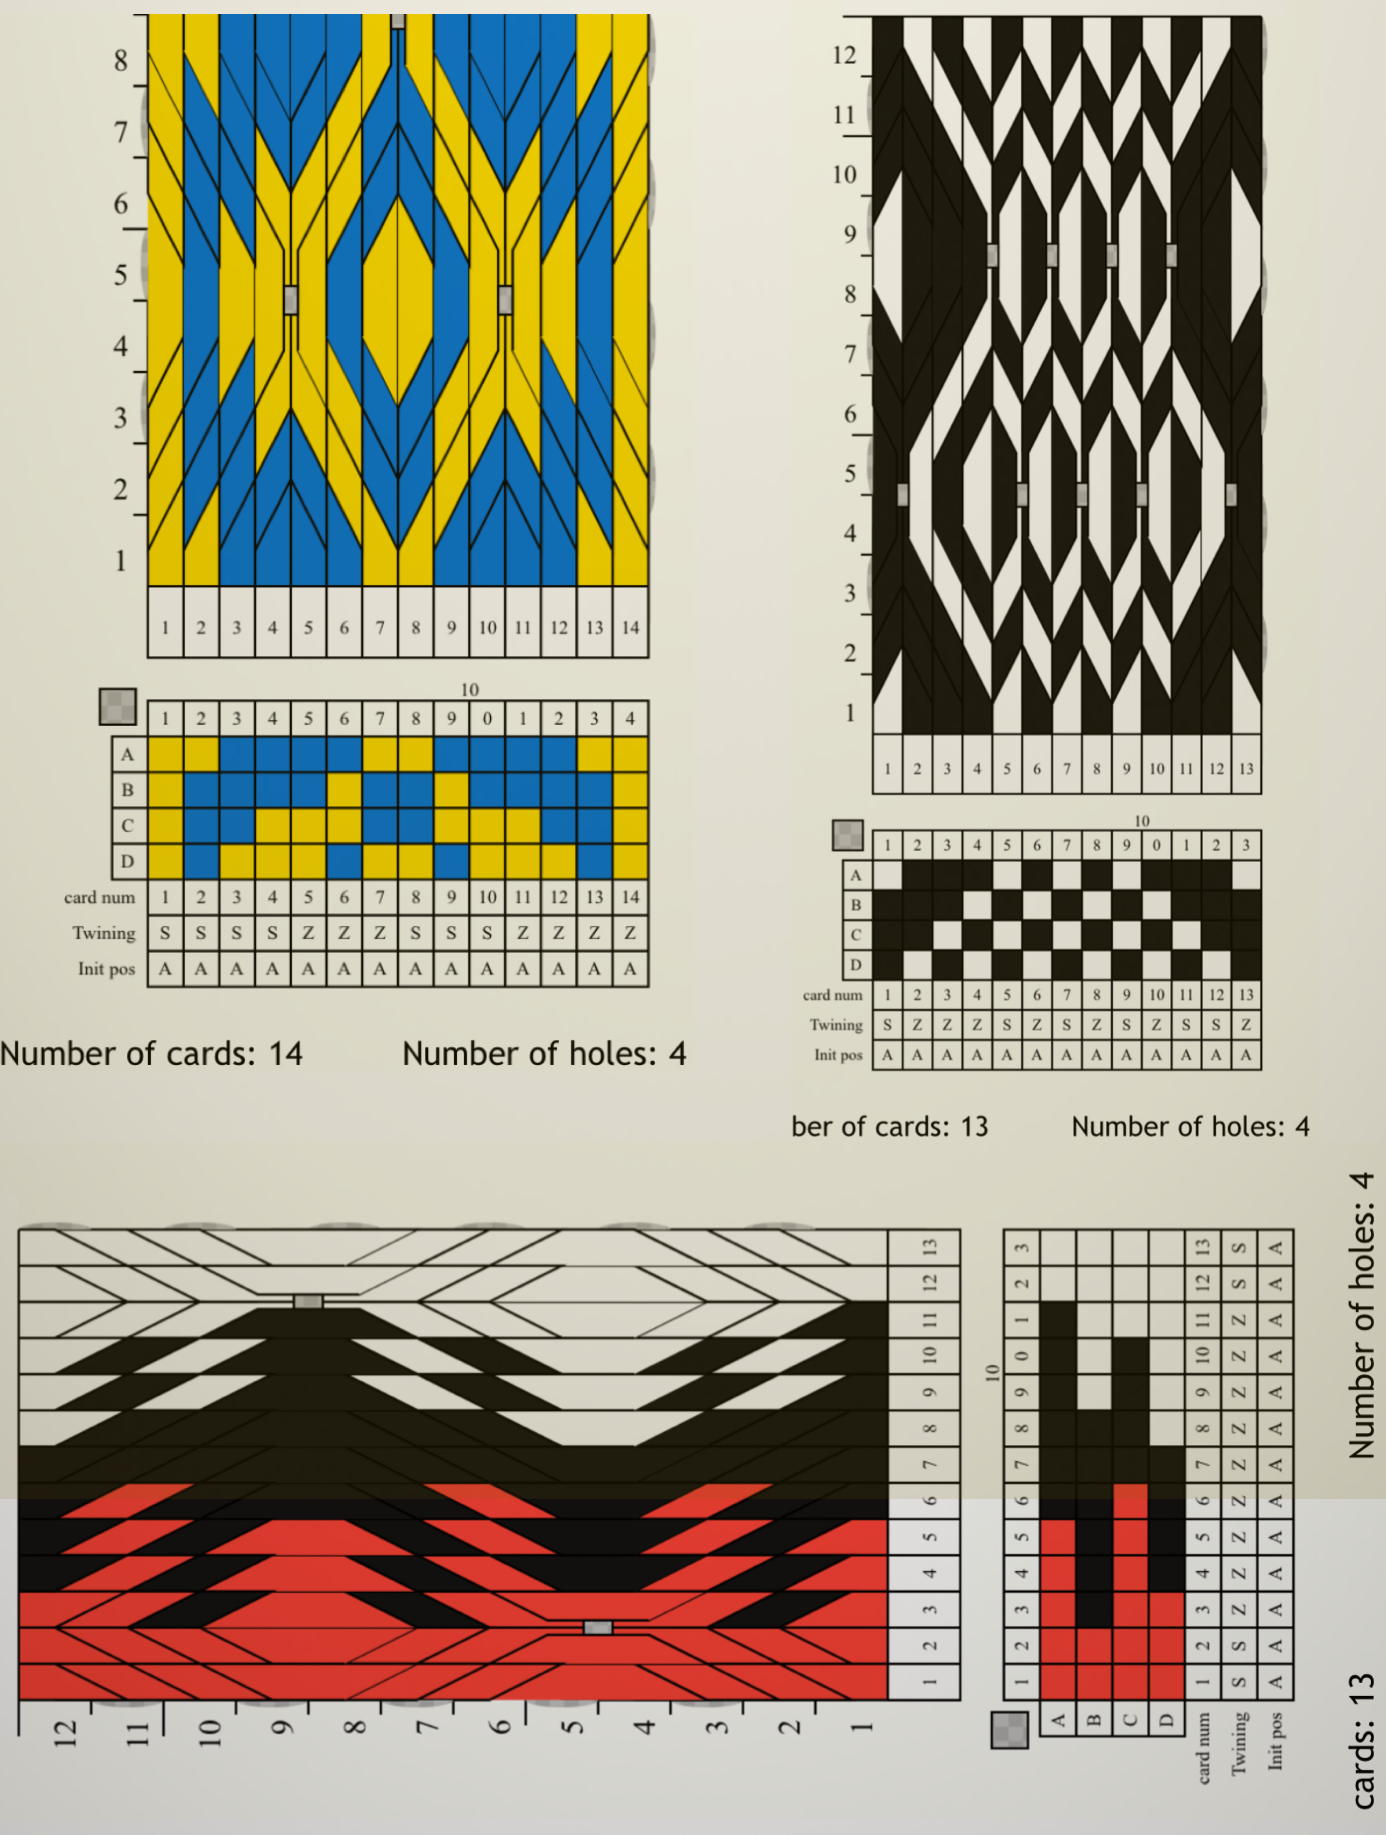
I have a larger project planned, but an experiment needs to be done on the small size, just in case it doesn’t work. It seems to me I tried this years ago, unsuccessfully. I think the difference is two fold. I did not have the patience I do now, and I hadn’t seen it done before. Thank you YouTube! Here are patterns for the larger project. It will incorporate 3 sets of cards and two small rigid heddles. Yes, I may have lost my mind, but it will be beautiful! Colors will be changed from the patterns.
I call this border pattern Marigolds. It’s 18 cards, but I added two more cards on the outside edges, bringing it to 20 cards. Here it is.I don’t think I’ve put the Exotic Flower Pattern out here. Is is gorgeous! Use a heavier weft thread to elongate/balance the flower.
That’s it for now. Happy weaving!